If you need to generate a list of random numbers in Excel you may want to avoid using the RANDBETWEEN formula. It will return duplicate numbers:

This is not ideal if your aim is to select numbered entries on a spreadsheet to review at random. You can generate a random list of numbers without duplicates by using the RAND formula instead. Enter the RAND formula in a column adjacent to the data set you are QCing.
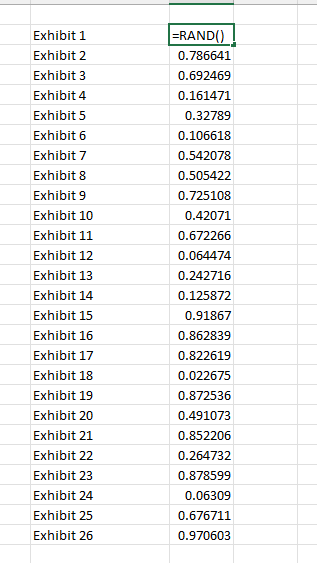
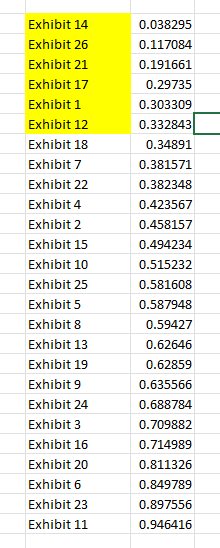
The RAND formula will generate new numbers each time the spreadsheet is edited. To get a static list of randomly generated numbers copy the results and use the paste values option. Then you can sort the data by the formula results to randomly select entries to review:
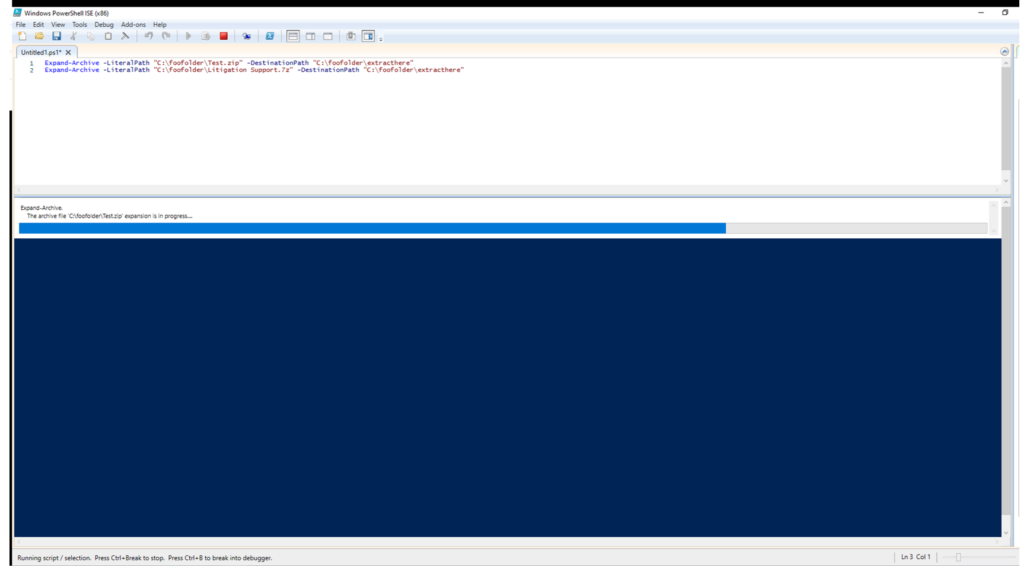
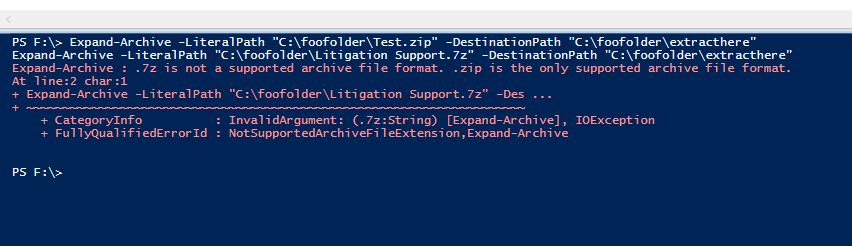
You can use a simple PowerShell script to extract the contents of multiple zip files. The command Expand-Archive followed by a file path to a zip file, will extract the contents to a location specified in the script.
Create a text file with each line beginning with Expand-Archive -LiteralPath ‘
. . . followed by the file paths, followed by -DestinationPath
. . . followed by the location that you want the files to be extracted to:
Expand-Archive -LiteralPath “C:\foofolder\Test.zip” -DestinationPath “C:\foofolder\extracthere”
Expand-Archive -LiteralPath “C:\foofolder\Litigation Support.7z” -DestinationPath “C:\foofolder\extracthere”
Open Windows PowerShell ISE (x86), and paste this script into the script pane.
Note that this method will not work for 7zip files.
I tested this tonight and successfully extracted more than 50,000 files from almost 50 zip files.
I am currently using an older version [v.11 – Professional Edition] of the Abbyy FineReader OCR software to render text for several thousand PDFs. The software does something which I have found to not be possible with Adobe Acrobat Pro or version 12 of the FoxIt PDF Editor software. It will successively pick up a check mark or ‘X’ in a check box.
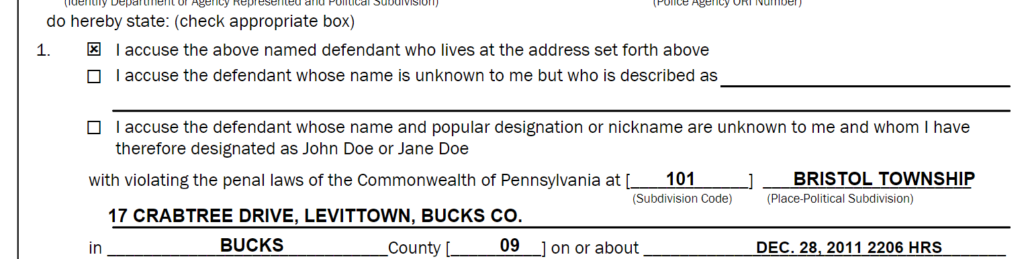
The software often gets the mark perfectly as:
[X]
. . . but will sometimes substitute a ‘K’ or if there’s a check in the box:

. . . it will enter a minuscule character like this: ø
An empty checkbox may get converted to an ‘n’ or just an empty box: □
But it interprets the marks consistently so if you’re analyzing thousands of documents you can successfully track when checkboxes were ticked off.
As discussed here before, even after files are removed from the Windows Recycle Bin, and even after a drive is reformatted, it’s still possible to recover deleted files with widely available tools. See the Tip of the Night for December 29, 2019.
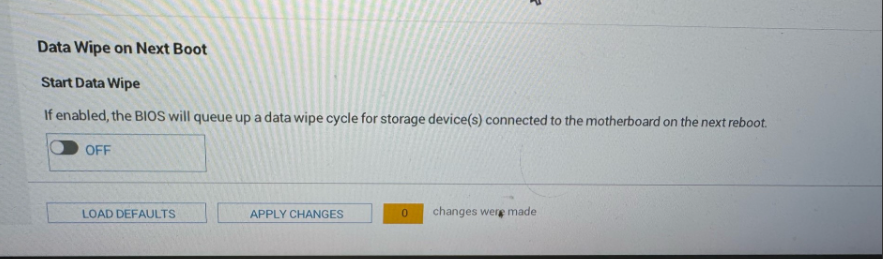
Windows 10 and Windows 11 include a reset option which can help wipe the drive of your PC, overwrite the existing data with new data, but this method may not be completely effective. Under Settings if you go to System . . . Recovery, you will see an option to ‘Reset this PC’.
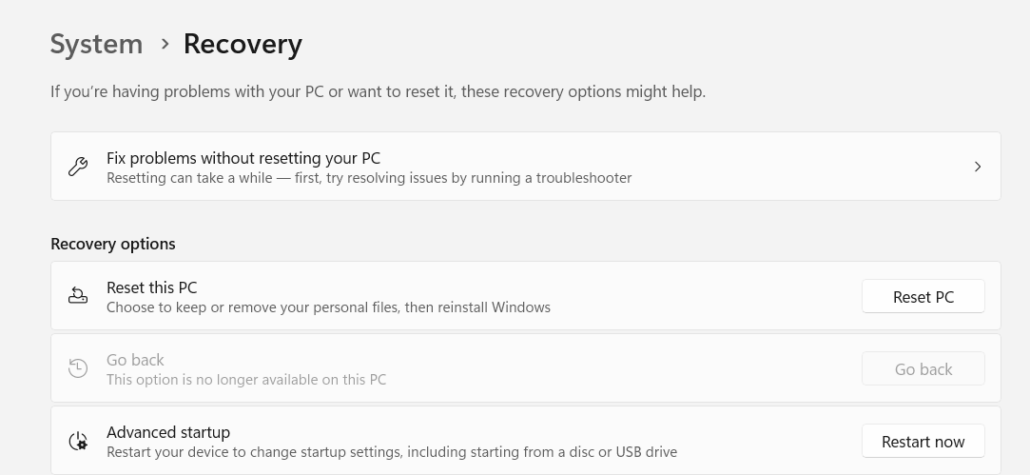
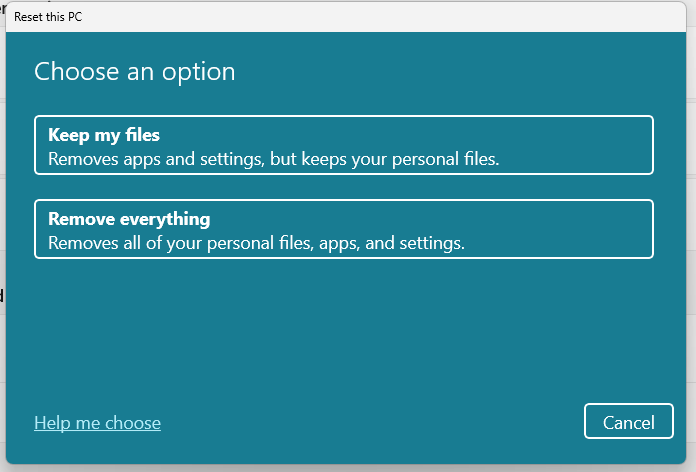
. . .if you then choose the option to ‘Remove everything’, that will initiate the process of wiping the hard drive.
However, there are some reports that even after the ‘Remove everything’ option has been run, files can still be recovered. See this April 2023 report by Tom’s Hardware, detailing the subsequent recovery of persumably wiped files with EaseUS Data Recovery.
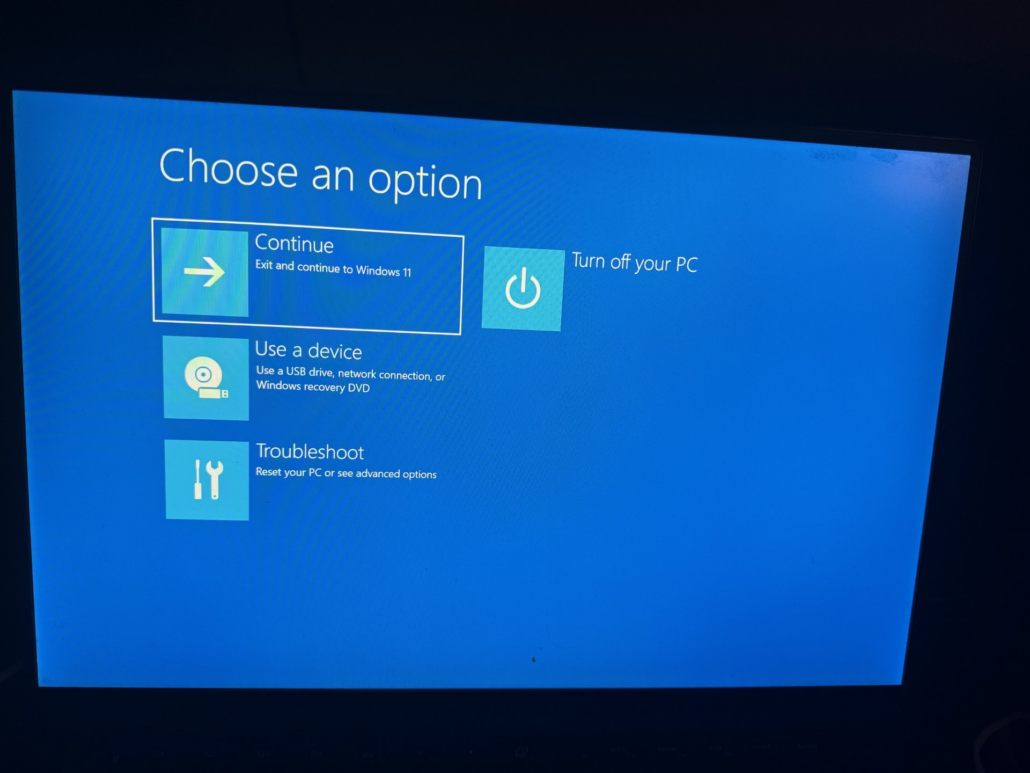
A better, or supplementary, option may be to use a secure erase option in the BIOS firmware that manages a computer at the most basic level without the operating system. You can enter BIOS by pressing F2 when rebooting on most kinds of PC (use F10 if you have a HP computer and F1 for a Lenovo device). Or, search for ‘advanced startup options’ in Windows

. . . and then select the option to ‘Restart now’

When your PC restarts you should then be given the option to go into Troubleshoot mode and then under advanced options select the firmware settings.
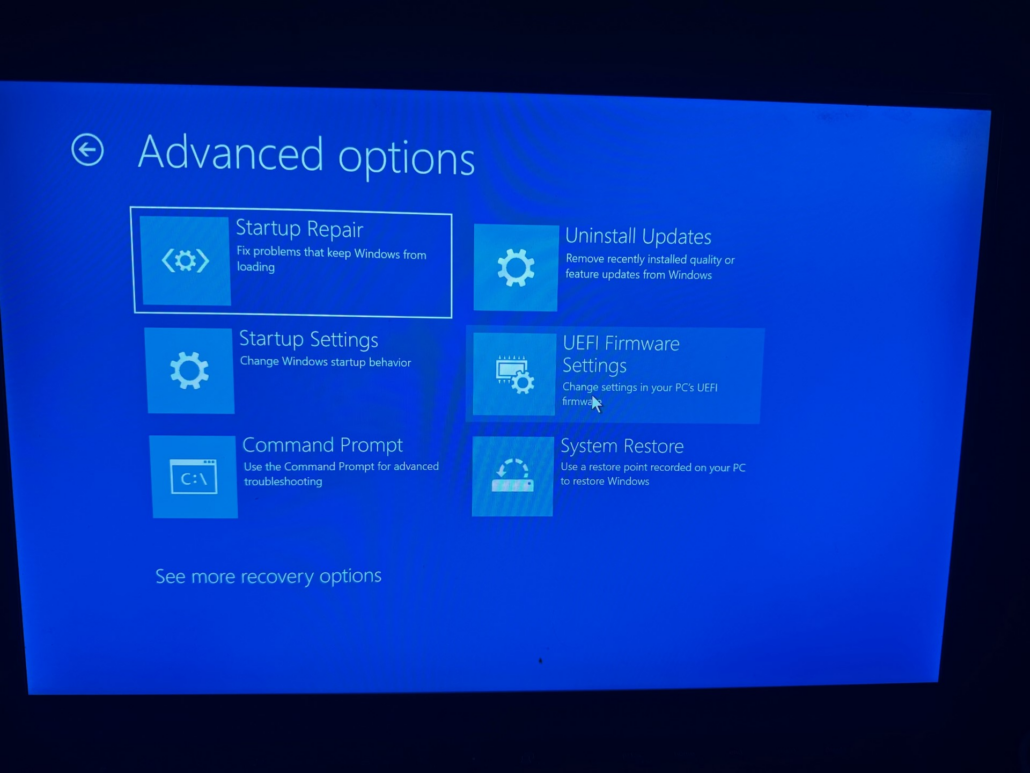
The Dell BIOS firmware includes an option to wipe the device.